On this page
Installation
You can download Parley directly or install it from the Asset Lib in the Godot Editor.
Prerequisites
- Godot 4.4+ is installed.
Instructions
Option 1: Installing from the Godot Asset Lib within the Editor
- Select the AssetLib button at the top of the Godot Editor.
- Search for
Parleyin the search box. - Select the Parley plugin.
- Click
Install. This will kick off the download. - Complete the first time installation by following the first-time installation instructions below.
Option 2: Download and install
- Download the compressed zip file from the Parley releases page on GitHub or from the Godot Asset Library.
- Extract the compressed zip file and place the
parleydirectory into youraddonsdirectory in your project. - Complete the first-time installation by following the first-time installation instructions below.
First-time installation

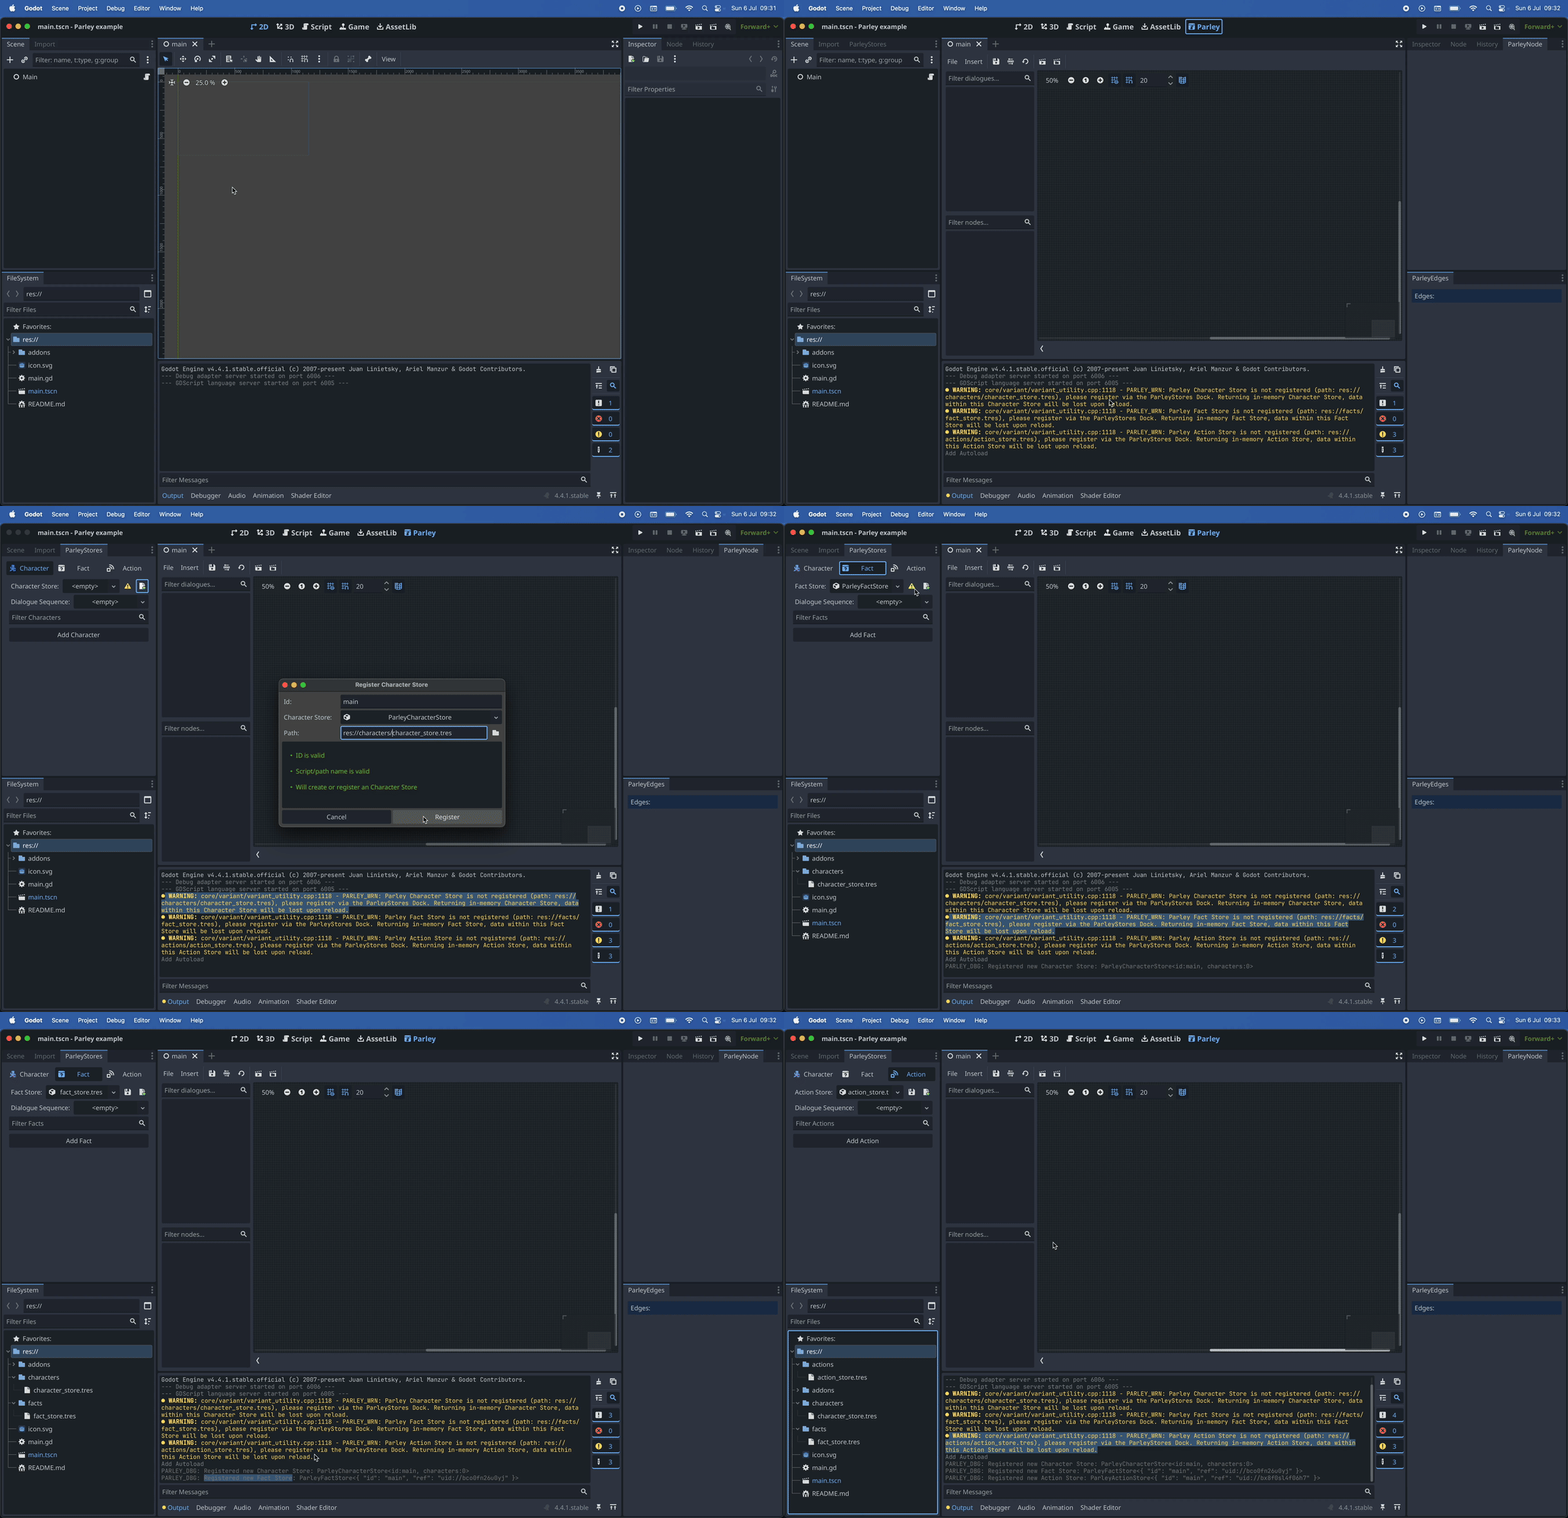
TipIf you’d like to access and follow along using the supporting video instead, please find the original mp4 here.
- Enable the Parley plugin for your project by navigating to:
Project->Project Settings->Pluginsand tickingEnabled.
WarningWhen you install Parley for the first time, the following Stores will need to be set up, otherwise you will receive some warnings in the Editor:
- Action Store
- Fact Store
- Character Store
You don’t need to add items to them at this point, just the presence of the stores is sufficient.
To resolve these warnings, follow the steps below.
- Navigate to the
ParleyStoresdock and select theCharactertab. - Click the
Create and register new Storebutton to open the Character Store registration modal. - Give the Character Store an ID. In our example, we call this:
main - Set the path where the Character Store resource will be saved. In our
example, we set this to:
res://characters/character_store.tres - Click:
Registerto save and register the Character Store. You should see the warning button disappear in theParleyStoresdock. - The Character Store is now set up and ready to be used. You can find out more about the Character Store here.
- Repeat the above steps for the Fact Store via the
Facttab in theParleyStoresdock. You can find out more about the Fact Store here. - Repeat the above steps for the Action Store via the
Actiontab in theParleyStoresdock. You can find out more about the Action Store here. - Now everything is set up, you can start creating Dialogue Sequences!